Friday, June 27, 2014

Manhattan Floral Birthday rs120

It's been ages since I posted.   I have been so tied up in that 9-5 job that pays the bills, it's in sane.  Things are starting to let up, so I'm looking forward to tending to my blog more often.

This card was actually for work.  My boss' birthday is this weekend and we celebrated at work today with cake and gave her this card signed by everyone in the group.  I really had a hard time a creative block, but thankfully I broke through and this was the result.


I went to one of my favorite sketch blogs for inspiration.   This sketch from Retro Sketches did the trick.  


All of the stamps and papers are from Stampin' Up.  I don't often stick to a single product line, but for this card, everything just went together so well.  The roses are stamped with Versamark, heat embossed with white embossing powder, water colored using an aqua painter and ink directly from the stamp pad and then cut out by hand.  Same process for the leaves.   The greeting is stamped onto the ribbon with Staz-On ink.  The roses and top layers are popped up with dimensionals.


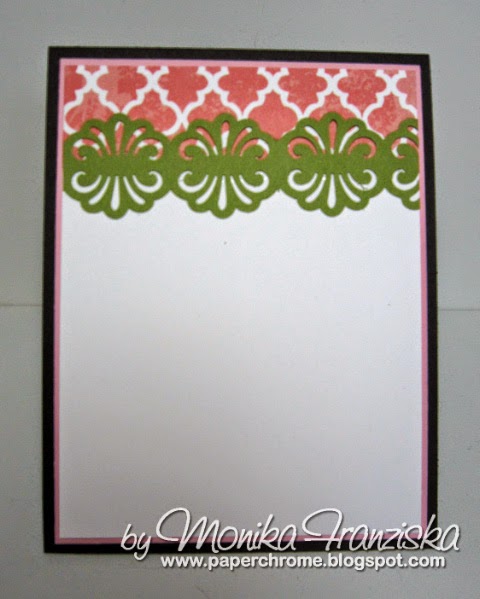
The inside of the card is simple and elegant.   The greeting is stamped with Versamark and heat embossed with black embossing powder.   Each corner is dry embossed with an embossing folder.


Supplies:
Stamps: Stampin' Up (Fabulous Florets, Fifth Avenue Floral, and Curly Cute)
Printed Papers: Stampin Up (Pockets of Posies, Urban Oasis)
Cardstock: Stampin' Up (Basic Black, Baja Breeze), Neenah (White)
Accessories: Stampin Up ribbon, pearl accents, white embossing powder, black embossing poweder
Tools: Martha Stewart corner rounder, Stampin' Up embossing folder (Manhattan Rose)


Wednesday, April 30, 2014

Wonder-flowery Thank You

As with everything in life, now and then it's time to take a break so that we can come back and enjoy that something we love anew.   That'a pretty much what it felt like for me as I pulled out some stamps, papers, dies and perused some of my favorite challenges today.  

I wanted to create a thank you card for my fun and crazy aunt that sent this amazingly large two foot chocolate Easter bunny for my kids to enjoy.   The colors from this week's ColourQ 239 challenge did the trick.  It's such a fun combination, it reminded me of my wonderfully fun aunt.  I combined it with this wonderfully flexible sketch challenge from Cardabilities #98


 Here are inspiration challenges for this card.   


Ingredients:
Stamp: Stampin' Up (Banner Greetings)
Ink: Stampin' Up
Printed Paper: Echo Park (Victoria Gardens)
Cardstock: Stampin' Up
Embossing Folder: Paper Studio
Border Punch: EK Success
Die Shape: Spellbinders
Flowers: Prima
Brads: Misc


Tuesday, April 1, 2014

Chevron Mother's Day Blossoms

I'm dusting off some materials and stamps I haven't used in a while.  This card is also a Mash up of two challenges: Dynamic Duos and Retro Sketches


 This card features all Stampin' Up products, from the DSP and cardstock to the stamps used.   


And here's the inside of the card.   


The challenges that inspired this card.  


Sunday, March 30, 2014

Koi and Fishy

This card uses Bombshell Stamp's  Koi Tattoo stamp set.   This set goes perfectly with this month's featured stamp set - Lotus Garden.


The image is stamped with Memento Tuxedo Black ink and colored with Copic alcohol markers.  The card features papers from Basic Grey's Konnichiwa collection.  Those designer printed papers go perfectly with both of the above linked Bombshell Stamps stamp sets.


Some of the tools used to create this card are Creative Memories Custom Cutting System - Ovals, and a Cuttlebug Embossing folder from the Plum Blossom set. The triangle punch is from Stampin' Up.  Accents include some pearls and ribbon.  


The inside of the card is simple with a border punched using a punch from Fiskars and a bit of ribbon. 


Saturday, March 29, 2014

Bombshell Blog Hop

You should have arrived here from Alaine's blog where I'm sure you saw some wonderful creation inspired by Washi tape.   Sad to say my work is still under construction and delayed due to a headache.  I worked way too many spreadsheets at work today.

But please be patient and come back for a visit to see my card.   In the mean time, please hop on to Kelli's blog.

Bombshell Blog: http://bombshellstamps.blogspot.com/
Alison: http://alisonsrandomthoughts.blogspot.com/
Marnie: http://www.papertivity.blogspot.com
Kim: http://www.craftypinkanchor.blogspot.com
Alaine: http://missalaineousmosaics.blogspot.com/
Monika: http://paperchrome.blogspot.com/ (You are Here)
Kelli: http://www.cajunstampingqueen.blogspot.com/
Kathi: http://kathstales.blogspot.com

Dynamic Duos Pick

One of my favorite challenge blogs is Dyanmic Duos. If you're looking for a fun challenge that's not to fussy and leaves loads of room for creativity, Dynamic Duos is perfect for that.   So I was thrilled when one of my cards again got chosen as a runner up this month.  


Click here for more info on the card below:  CLICKY


Wednesday, March 26, 2014

Bombshell Blog Hop - Under Construction

You should have arrived here from Alaine's blog where I'm sure you saw some wonderful creation inspired by Washi tape.   Sad to say my work is still under construction and delayed due to a headache.  I worked way too many spreadsheets at work today.

But please be patient and come back for a visit to see my card.   In the mean time, please hop on to Kelli's blog.

Bombshell Blog: http://bombshellstamps.blogspot.com/
Alison: http://alisonsrandomthoughts.blogspot.com/
Marnie: http://www.papertivity.blogspot.com
Kim: http://www.craftypinkanchor.blogspot.com
Alaine: http://missalaineousmosaics.blogspot.com/
Monika: http://paperchrome.blogspot.com/ (You are Here)
Kelli: http://www.cajunstampingqueen.blogspot.com/
Kathi: http://kathstales.blogspot.com

Tuesday, March 18, 2014

Dynamic Motorcycle News (DD94)


I love the Dynamic Duos challenges.   This week's color challenge is to use Basic Black and More Mustard.   Here's my card.


The image is from Bombshell Stamp's Harley Bikes set.  It's stamped using Memento Tuesedo Black ink and colored using Copic markers.   I used printed papers from My Mind's Eye Lost and Found collection.   Stampin' Up cardstock.  The embossing folder is by Lifetime Crafts (Quickutz).  The greeting is from Stampin' Up's Pennant Parade stamp set and punched using a Creative Memories Circle punch and layered using a Stampin' Up 7/8" Scalloped Circle punch.  For the distressing, I used some Tim Holz/Ranger Distress Ink. 


And the inside of the card.  I added a punched border (Stampin' Up/EK Success punch).


Sunday, March 16, 2014

Muse Monday - Lotus Garden

This Monday Bombshell Stamps is featuring their Lotus Garden stamp set.  Here's my creation that's featured on the Bombshell Stamps' Blog this Monday.


Here's the inside of the card.


The image is stamped with Memento Ink and colored using Copic markers.
The printed papers are by Little Yellow Bycycle and the cardstock is by Stampin' Up.  
The border is created using a border punch by EK Success.   Lastly, the dry embossing is done using a Spellbinder's embossing stencil.  


Wednesday, March 12, 2014

Bombshell Sketch - Live to Ride

I used this month's Bombshell Sketch to create this card.   It's a great card sketch. Join the challenge on the Bombshell blog.  I chose to use the Live to Ride set from Bombshell Stamps.


Here's the sketch.


The image is stamped using Memento Tuxedo Black ink on Neenah white cardstock and colored using Copic markers.   The printed papers are by My Mind's Eye. The brads are by Stampin' Up and so is the black cardstock.   As a finishing touch, I aded some liquid acrylic to the two banners on the stamped image and covered the orange barnwood image in liquid acrylic as well.  


The inside of the card is a white cardstock base trimmed out with some scraps of designer printed paper.   


Wednesday, February 26, 2014

Bombshell Stamps Color Challenge Blog Hop

Bombshell Stamps has a great and cheerful color challenge for this month's Hump Day Blog Hop.   You should have arrived here from Glittery Katie's site.  If not, be sure to see the list for the blog hop below and check out the other great interpretations created for this fun color challenge.

For my card, I decided to use a set that I don't go to very often just to challenge myself a bit more.  I do love the Art Deco feel of this particular pinstripe stamp image.   As my description reveals, the stamp is from Bombshell Stamps' Pinstripes set.  This set also makes for a great accent on a masculine card with a car or motorcycle theme.  Use it inside your card or on the front.  This stamp is the largest one in the set and it along with the others make for great accents.


Here's the color challenge image from which we drew our inspiration.   One thought I had when I looked at this inspiration color swatch is to replicate the paisley look.  Unbeknownst to me, I kind of managed to do that with the pinstripe image I chose.  


Here's another look at the card, this time from an angle.   The printed paper and cardstock are by Stampin' Up.  The white cardstock is by Neenah.  The image is stamped with Memento Tuxedo Black ink and colored with Copic alcohol markers.  The front decorative panel of the card front is raised using some dimensional adhesive.  


Hope you enjoyed this card.   Hop on along to visit Kathi.  Be sure and stop by to visit all of the gals this month to see what they created.   

Blog Roll
Monika: http://paperchrome.blogspot.com/ (you are here)


Friday, February 21, 2014

Rebel Let's Ride

It's getting warmer around these parts. The other night we even ran the kids to and from the soccer fields on our motorcycles.  Yay!  I'm excited to have my two wheels dusted off a bit!  Having riding season around the corner inspired this card along with a sketch from CAS(E) this Sketch..   The card features the Live to Ride stamp set from Bombshell Stamps.


I stamped the wheels and the saying with VersaMark and embossed them with colored embossing powers.   Papers are from My Mind's Eye.   Cardstock is from Stampin' Up. 


Here's the sketch I used.


Friday, February 14, 2014

Easy Peasy Covered Chipboard

Check out the frame on this card.  It's covered chipboard.   Yup, that stuff that usually takes way too much time to trim, file, distress, trim some more and and and... Oh what a headache and often not worth it.   How would you like to create a covered chipboard shape like this in mere minutes.   Well, here's how.


Card: "You're the Fairest of Them All"


Start with a steel rule die with the shape you'd like to cut.  I'm using these two dies from Tim Hotz.  Yes, it's two dies.   The large frame has an opening with a metal base.  The inset piece has magnets on the back that hold it nice and snug.   

Back to the tutorial

Simply measure how large of a piece of chipboard you'll need to cut.   Here I'm looking at 4 1/2 inches wide. 


I picked my cardstock....which can take hours and hours.   Gyah!  What happened to those early days when I didn't have that big of a selection to chose from.   Eh... wouldn't trade em for the set up I have now.  :-)

Note I also cut a piece of chipboard 4 1/2 inches wide.  I used a nice and sturdy piece that came from some package of paper.   I just save those for work surfaces and for, well, THIS.


Here's the trick.  Run your paper through your Xyron.  It gives you a nice uniform coverage and is fast.  No drying time.  If you don't have a Xyron, use a quick drying wet adhesive for good coverage and to keep your paper from warping. 


Out of the Xyron


Adhering it to the chipboard.


Nicely adhered.


Run it through your die cutting machine.   A Sizzix or Cuttlebug work great. 


Separate out the die


And you have a piece that you could use as is, but I want to do away with those brown chipboard edges. 


I use a marker, in this case a Tim Holtz Disress marker to color the edges.   Great color match to the paper.   
I also use a sponge and some Distress ink to add a bit of ink to the edges of the paper on the chipboard.  That way if there's a slight color difference from the paper to the marker I'm using, it blends it all in. 


And your frame is done.  


And here it is used on a card with mirror paper that I get in the craft department in large sheets and cut down.  As I was putting this together, I did note to myself that this frame is a bit large for this card and could use a larger canvas.  I may move it sometime in the future.  


Oh and note to self.  Don't take a picture straight on when using this incredibly reflective mirror board.  My hands are right under this devil's head.  It almost looks like a selfie. Oops. 


Papers by Little Yellow Bicycle and Authentique  Cardstock by Stampin' Up.

Stamp is from Bombshell Stamp's Cherry Bomb set. 


Related Posts Plugin for WordPress, Blogger...